

How Can We Help?
Dimo – Set-up first printing
Follow these instructions to successfully create a print order.
- Go to menu item:
Production – 1st Printing
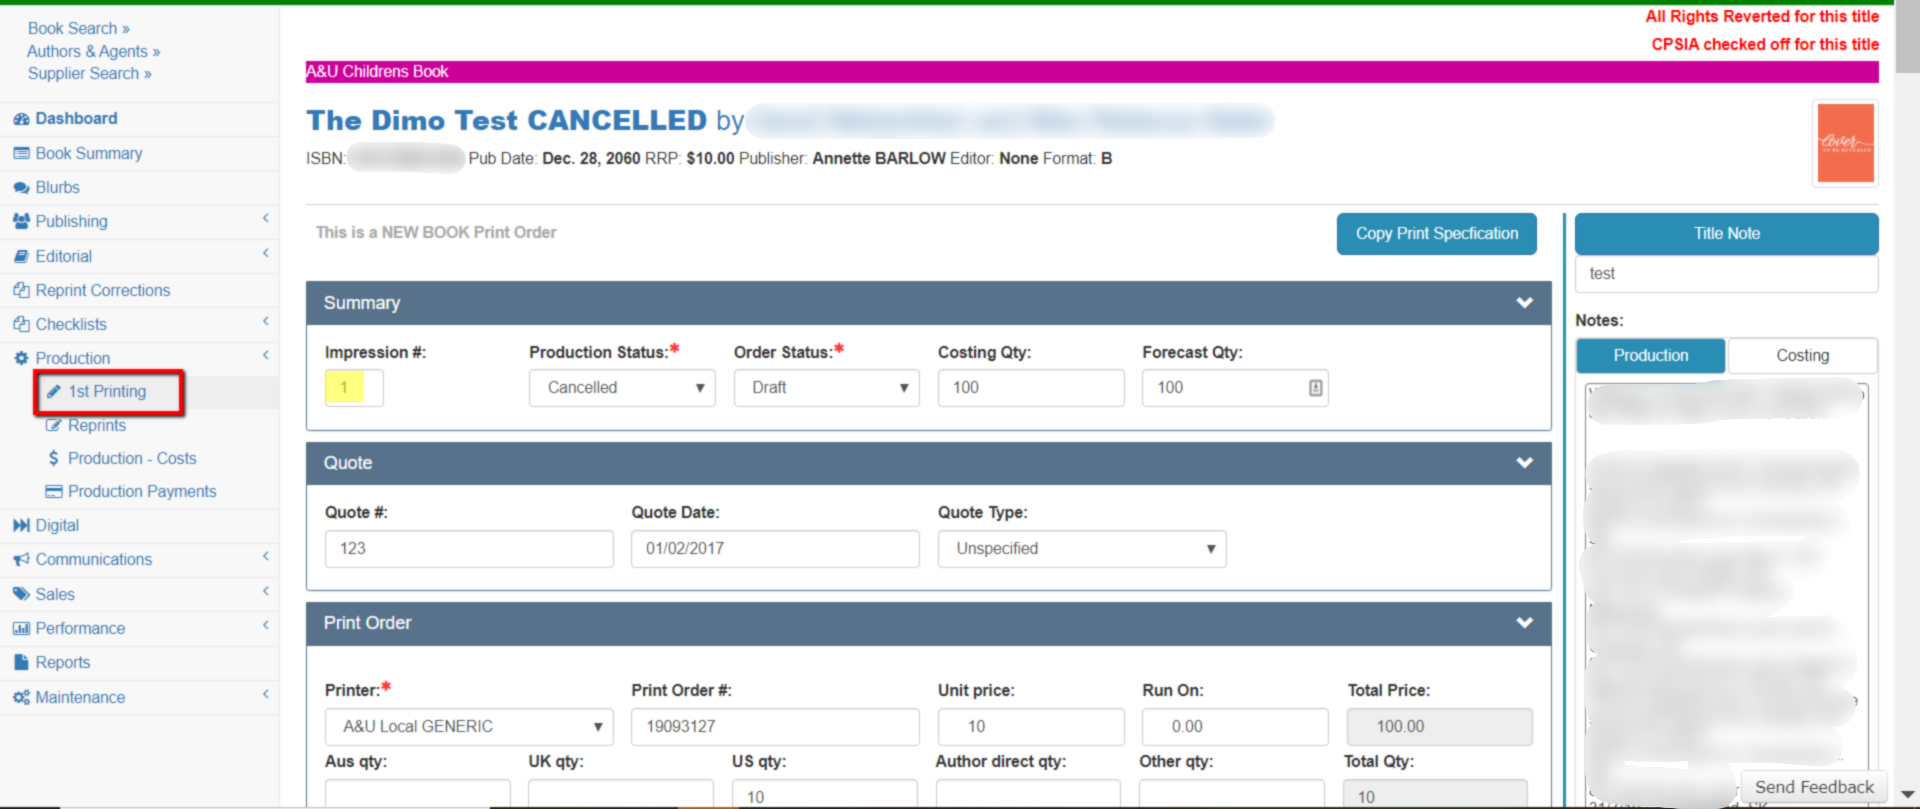
Work through the sections on this page as follows;
- Summary
- Check and if necessary update the production status to ensure it reflects where the title currently is in its life cycle
- Give the status of the Order Status. The main statuses are
- Draft – This order is not ready to be submitted
- Purchased – This order has been sent to the printer
- Received – This order has been received from the printer
- Costing Qty and Forecast qty should only be updated if this is not the final order
- Quote details (optional)
- If you have received a quote for this order then fill in the details here
- Print Order
- Fill in the printer
- Printers are gathered from your supplier list
- Defaults can be set by printer. If there fields that should always be the same when a printer is selected you can ask for that configuration to be made.
- Print order # – this is automatically populated but you can change it to your own number if you like. It must be unique however.
- Unit Price – The cost per unit you will be paying. This will also calculate the total price.
- Run-on (Optional) – If you have agreed on a run on cost you can enter this here.
- Enter Quantities (Aus, UK, US, Author, Other)
- Enter the quantities that need to go to each location. The delivery instructions can be set for each title.
- Fill in the printer
- Book Details
- If you are producing a standard book then you should fill in the basic details for the book here.
- If this IS NOT a standard book product you should leave this section BLANK
- Binding Details
- If you are producing a standard book then you should fill in the basic details for the book here.
- If this IS NOT a standard book product you should leave this section BLANK
- Printing
- This is the way the print order is to be consolidated together. For every section that makes up your book or product, you should enter a section in here
- Use the fields as follows
- Section – the type of section it is
- Pages – the number of pages the section applies to
- Colour – the colour application
- Height – Width
- Detail – additional detail about the section
- On Stock – The stock that applies to this section
- Stock finish – the finish of the stock
- Example: A Hardback book with a ribbon would have 3 sections
- HB
- TEXT
- RIBBON
- Packaging
- If applicable you can put in the packaging instructions for the print order. Packaging instructions should normally be pre-populated with the set-up from the printer
- Material Supplied
- Enter in here details about the materials that you will supply to the printer
- Proofing requirements
- Enter in the type of proofs you want and then any specific details about what you require.
- Schedule
- Enter in the schedule for this print order. Depending on the complexity of the order will depend on how many schedule points you want to monitor.
- Your publisher set-up will determine which of those schedule dates appear on your print order.
- Advances
- The detail on the advances you would like supplied for this print order.
- Advance defaults can automatically be entered based on the printer defaults.
- Delivery Instructions
- Delivery instructions default to the values for the printer, however, if you need modifications you can edit it here
- Approvals (Optional)
- It is not compulsory by default to authorize a Print Order. By using this option it will add the authoriser/s name to the print order and record when this happened.
- Save or Print Order
- When finished click here to Print or Save the order.
- Always use Print Word New.

 PRINTING CHECKLIST CREATE REPRINT